We use a lot of Apple Cider Vinegar in our home on a daily basis.
I use it for additives to drinks during the day, for anyone who is feeling a bit sick with a cold or sore throat and in cooking or making dressings.
I like to use Braggs Raw Apple cider Vinegar and at $12 a 750 ml bottle it can add up very quickly.
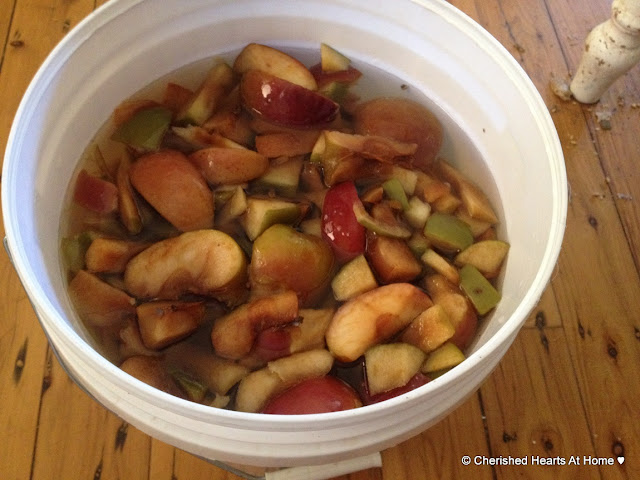
So I have been making my own for the cost of 2 cups of sugar and apple scraps. My last batch which is pictured for this post produced about 6 1/2 Liters.
The most expensive part of this process is TIME! As it takes about 3 months give or take a couple of weeks.
I have not managed to keep us supplied continuously yet, but that will come I am sure as I commit to the process more steadily.
Now onto the process!!
I use a 3 liter honey container and collect all my apple scraps in this until it is filled up. As the children finish eating an apple or peel it I get the container out of the freezer and put the scraps in and then place back in the freezer.
I usually fill 2 of these containers before I am ready to start.
Then I tip the contents into a plastic bucket I bought from Masters (above)
I usually fill 2 of these containers before I am ready to start.
Then I tip the contents into a plastic bucket I bought from Masters (above)
Then I add 30 cups of water and 2 cups of white sugar ( this and for my Kombucha are the only times I use white sugar)
and stir it in to dissolve the sugar.
You want to make sure there is enough water to submerge the apple scraps and more water is more vinegar. Do not exceed 2 parts water to 1 part scraps which will leave you with a diluted, low acidity vinegar.
You want to make sure there is enough water to submerge the apple scraps and more water is more vinegar. Do not exceed 2 parts water to 1 part scraps which will leave you with a diluted, low acidity vinegar.
Then I cover the bucket and leave it under our baking bench in the kitchen for about three weeks.
In the first few days I give it a stir and then periodically over the three weeks, checking on it daily.
Here it is just before I am about to decant it into bottles. This is three weeks later.
Notice the bubbles! They have been there through out the process and is part of the fermenting process You will notice the sharp smell. Using a wooden spoon to push down the scraps into the liquid, gently mixing the scraps that rise to the top.
Notice the bubbles! They have been there through out the process and is part of the fermenting process You will notice the sharp smell. Using a wooden spoon to push down the scraps into the liquid, gently mixing the scraps that rise to the top.
Now it is time to strain the apple scraps out.
I use a large colander with a piece of light cloth in side the colander placed over a very large bowl.
Pour the mixture into the colander and strain.
Make sure you don't overflow your container and waste all that goodness..
I then squeeze the scraps with a spoon until I cannot get any more more out of them.
Next use a funnel and pour your apple liquid into sterilized bottles. Use small pieces of muslin and secure it on top with a rubber band.
Now place your apple ferment in a warm, dark place for the next 4 to 6 weeks.
Check by tasting after about 4 weeks and see if it is to your liking.
If your ferment still has a little alcoholic smell or flavor or if the potency of the acid just doesn't quite pack the punch of vinegar you may simply cover and return it to a warm, dark place for another 2 weeks or so. Just check it every week you continue to ferment it, tasting to see if you have reached the proper acidity.
If ready put a lid on your bottle and start to use.
And now you have your very own, homemade RAW apple cider vinegar with all of the flavor and natural health benefits.
Important measures-
2 frozen buckets of apple scraps equals approximately 7 1/2 cups
30 cups of water
2 cups of sugar
not more than double water to apples

Linked to - Wise Woman Linkup


2 comments:
Thank you so much. Just what I was looking for.
You can have both Apple Cider and Apple Cider Vinegar if you decant some of the Cider before it turns sour. Bottle it in PET bottles as the fizz will increase and can pop wine corks. Use second half of bucket for ACV by following steps after straining with remaining Apple cider...to get to vinegar you should have a whitish scum forming on the surface- this is the vinegar "mother". Use this mother when beginning a new batch of ACV.
Post a Comment