Showing posts with label Tutorials n Crafts. Show all posts

Sunday, February 14, 2016

How to make and use Magnesium Oil

Magnesium Oil is not actually and oil. It is  simply called magnesium oil because of the oily feel of magnesium chloride suspended in water. Now this is not the same magnesium found in Epsom salt which many people have on hand. Epsom salt is magnesium sulfate. Magnesium Oil is magnesium chloride and is absorbed through the skin much better.

I started using this when I went to my Natropath and she advised me to take Magnesium. Well I did a little research and found that Magnesium  is better absorbed through the skin than taking supplements.

Most people have a magnesium deficiency. We used to get magnesium from our soil and water supplies, we’ve now depleted our soil and  our water supplies don't have many  trace minerals either. So, in and effort to combat this we can  eat more magnesium-rich foods like nuts, grains, and seeds, and we can supplement also with magnesium.

Essentially you make this oil up and spray it onto your body. Some of my children finds it itches them so I allow them about 30 mins before a shower and then let them wash. By this time the magnesium should have absorbed into the body and so not be 'washed off.'

This is an easy Recipe to remember as it is essentially equal parts-

1/2 C. Magnesium chloride flakes 
1/2 C. purified or distilled water 

How to-
1. Bring the water to a boil.
2. Add the magnesium flakes and stir well until completely dissolved.
3. Remove from heat and allow to cool, then transfer into a spray bottle
4. Spray on body and rub in. I use about 4-5 sprays into my hand and rub into my body twice

Blessings to you and your homes,
 

Thursday, July 30, 2015

Making Apple Cider Vinegar for Your Home Use

We use a lot of Apple Cider Vinegar in our home on a daily basis.
I use it for additives to drinks during the day, for anyone who is feeling a bit sick with a cold or sore throat and in cooking or making dressings.

I like to use Braggs Raw Apple cider Vinegar and at $12 a 750 ml bottle it can add up very quickly.

So I have been making my own for the cost of 2 cups of sugar and apple scraps. My last batch which is pictured for this post produced about 6 1/2 Liters.
The most expensive part of this process is TIME! As it takes about 3 months give or take a couple of weeks.

I have not managed to keep us supplied continuously yet, but that will come I am sure as I commit to the process more steadily.

Now onto the process!!
I use a 3 liter honey container and collect all my apple scraps in this until it is filled up. As the children finish eating an apple or peel it I get the container out of the freezer and put the scraps in and then place back in the freezer. 
I usually fill 2 of these containers before I am ready to start.
Then I tip the contents into a  plastic bucket I bought from Masters (above)
Then I add 30 cups of water and 2 cups of white sugar ( this and for my Kombucha are the only times I use white sugar)
 and stir it in to dissolve the sugar.
You want to make sure there is enough water to submerge the apple scraps and more water is more vinegar. Do not exceed 2 parts water to 1 part scraps which will leave you with a diluted, low acidity vinegar.
Then I cover the bucket and leave it under our baking bench in the kitchen for about three weeks.
In the first few days I  give it a stir and then periodically over the three weeks, checking on it daily.
Here it is just before I am about to decant it into bottles. This is  three weeks later.
Notice the bubbles! They have been there through out the process and is part of the fermenting process You will notice the sharp smell. Using a wooden spoon to push down the scraps into the liquid, gently mixing the scraps that rise to the top.
Now it is time to strain the apple scraps out.
I use a large colander with a piece of light cloth in side the colander placed over a very large bowl.
Pour the mixture into the colander and strain.
Make sure you don't overflow your container and waste all that goodness..
I then squeeze the scraps with a spoon until I cannot get any more more out of them.
Next use a funnel and pour your apple liquid into sterilized bottles. Use small pieces of muslin and secure it on top with a rubber band.
Now place your apple ferment in a warm, dark place for the next 4 to 6 weeks.

Check by tasting after about 4 weeks  and see if it is to your liking.
If your ferment still has a little alcoholic smell or flavor or if the potency of the acid just doesn't quite pack the punch of vinegar you may simply cover and return it to a warm, dark place for another 2 weeks or so. Just check it every week you continue to ferment it, tasting to see if you have reached the proper acidity.
If ready put a lid on your bottle  and start to use.

And now you have  your very own, homemade RAW apple cider vinegar with all of the flavor and natural health benefits. 

Important measures-
2 frozen buckets of apple scraps  equals approximately 7 1/2 cups
30 cups of water 
2 cups of sugar
not more than double water to apples 

Sorry about the line spacing my template just kept changing on me 
Blessings to you and your homes,
 
Linked to - Wise Woman Linkup

Monday, February 16, 2015

Lent, Easter and all the way to Pentecost Posts (updated for 2015)

I was determined to be prepared for our Lenten Journey this year (2015) but sadly the closest I have come is to preparing is looking at this blog post and updating it.
So tonight I will be planning how we will journey along this road to the Glorious Easter Celebration.
I'm not sure what we will do as a family or even what my own private intentions on growing  closer to our Lord will be but hopefully it will be a very fruitful journey for us all.

From 2014- It has been a week since we started our Lenten journey this year and already I can say we have experienced quite a few challenges or if you prefer opportunities to grow in love for our Lord and to look to him for strength and help.

In fact we have tried to not only give up things this lent but to increase our prayer life as well and I confess that it has been a sacrifice perhaps more than we anticipated to stay strong in these areas along with the added opportunities that have come our way.

However I trust that this will be a time of refining through the fire and as such a time of much joy as we Enter into the Easter season.

As I look through the past posts I would like to share this updated view of our life as we share the Liturgical journey from Shrove Tuesday through til the celebration of Pentecost.

As I was preparing this it is apparent that some years I have been able to post more than others and I can only say this reflects my commitment here as well as the commitment to my family and as such not every year will be represented on this blog. For even though we celebrated together as a family it was not important enough or time just slipped by without ever sharing in this space and thus we have some gaps that can only be filled through my mind memories and personal photos.

However here are our memories as recorded her in this space thus far:

BOOK LISTS-
Lent and Easter book list
Amon's Adventure- daily read aloud for the family (2014, 2013)
The Bronze Bow (our 2015 read aloud)
March Liturgical Books
April Liturgical Books

SHROVE TUESDAY/MADI GRAS/CARNIVAL-
Hiding the Alleluia 2014
Felt Mardi Gras Masks- Tutorial Part 2
Felt Madi Gras Masks - Tutorial Part 1

Shrove Tuesday/ Fat Tuesday/ Madi Gras:
Shrove Tuesday/Madi Gras 2013
Our Shrove Tuesday/Madi Gras Celebrations 2012
Perfume Eggs (Calazane Eggs)  Tutorial 2012- a traditional activity for Carnival
Our celebrations in 2011 - including cake ideas, food and activities
Shrove Tuesday 2010
Ash Wednesday 2014
Ash Wednesday: Ideas and a reflection 2011
 Ash Wednesday: 2010 and 2009 a reflection

MAKING LENT MEANINGFUL- activities and prayers
Lenten Countdown 2014 - Pockets full of Love Calender
Preparing for Lent and some Feast Days 2013
Lenten Quest 2011- our goals for  the Lenten season

Salt Dough Crown making 2013
Salt Dough Crown of Thorns - Tutorial

Preparations in the Home Post:
Including Salt Dough crown of thorns, hiding the Alleluia, Weekly Lenten Candle Log,
Stations of the Cross Box:  Simple Homemade version to be used in the Stations of The Cross for small ones each Friday

Paschal Mystery Eggs (Resurrection Eggs) - Home made version

Making a homemade Benjamin's Box based on the Book Benjamin's Box

Calvary Crosses- we make these and put them up every year. Last year they were very large...life like.

Felt Pocket Eggs Tutorial 2012- this can be filled with a little present or chocolate eggs

'Crack me Eggs' tutorial 2012

Making a Felt  Easter Bunny  2011- Tutorial

Egg Decorating 2009
ST PATRICK DAY-
St Patrick's Day Celebrations in our home 2014
St Patrick Celebrations 2013
St Patrick Celebrations at home 2012
Happy St Patrick's Day to You 2012
St Patrick's Prayer 2011
Making Leprechauns for St Patrick's Day
St Patrick's Day 2011
St Patrick's Day 2010
St Patrick's Day Plans 2010
St Patrick's Day 2009

ST JOSEPH-
Solemnity of St Joseph in our Home 2014
Solemnity of St Joseph 2013
St Joseph Day 2010

LAETARE SUNDAY-
Laetare Sunday Celebrations 2014
Laetare Sunday 2013
Laetare Sunday 2011
Laetare Sunday Ideas and Information
Laetare Sunday/ Mothering Sunday 2010
Passion Week 2009 :  figures for a play

HOLY WEEK-
Celebration Palm Sunday 2014
Celebrating Palm Sunday in our home 2012
Palm Sunday 2012

Palm Sunday Ideas and Activities 2011
Making Palm Crosses Tutorial 2011

Palm Sunday 2010 - including how we made palm crosses for our home
Palm Sunday  (no plans just image)

Holy Week Activities 2013
Spy Wednesday 2013 (In Holy Week)
Holy Week Ideas 2012
Holy Week Activities 2011- stacks and stacks of ideas for Easter in this one post
Holy Week Plans and Activities 2010
Thoughts for Holy Week 2010
TRIDUUM-
Passion Sunday Celebrations 2014
Passion Week Actitivites and colouring 2014
Passion of Our Lord Videos to watch on line 2014
Maundy Thursday: Figures for  play for the younger children with hand painted apostles
Holy Thursday 2012
Last supper 2010
Last Supper Tradition or Seder Meal 2010- Script for family meal included

Holy Thursday,  Good Friday and Holy Saturday 2013-  celebrations in our home
Holy Thursday and Good Friday 2012 - celebrations in our home
Holy Thursday and Good Friday 2011 - hot cross bun recipe, Easter cookies and crack me eggs

Good Friday Information
Good Friday 2014 - Sourdough Chocolate Chip Hot Cross Buns recipe too (different to the one below)
Good Friday 2010 - including Hot Cross Bun recipe
Good Friday 2009 

From Mary's Point of View - a hymn
Reflection 2011

Holy Saturday and Resurrection Cookie recipe 2012
Resurrection Cookie Recipe within this post (for Holy Saturday Night)
Making a Felt  Easter Bunny  2011- Tutorial

Holy Saturday and Easter Table 2011
Christ is Risen 2011
Easter Celebrations 2011

Easter Table 2010
Easter Day 2010
Making a Lamb Cake 2010

Easter Table 2009
Easter Celebrations 2009
THE ASCENSION :
Our Original Plans 2009
Celebrations 2010
Plans and Scenes in our Home 2011
Updates in 2012
Actual Celebrations 2011

PENTECOST:
Celebrating in 2013
Celebrating in 2012
Celebrating in 2010
Plans for Pentecost posted in 2009

Blessings to you and your homes,

Friday, May 16, 2014

Easter 2014 - Making Easter Robins

Each year I make a little novelty for want of a better word that is Easter related for our home made Easter Baskets that are placed on the table to be seen first thing in the morning.
This year after reading The Easter Robin I wanted to make a Robin and help each of us think about sacrifice that is such a part of this story and portrayed so well as we went about our Easter Day.

So I drew up a little pattern (oops forgot to add that one to the photo's) of a Robin and then cut out the felt and spent quite a few hours sewing up the Robins (well into Easter morning actually...)

Each Robin was fairly quick and I developed a pattern and rhythm that helped speed things along, but when you sew several, say 12 of them at once (none for the children not at home this year, sorry) the time can pass very quickly. Especially when you have other things to organise as well and start to panic you will not finish in time.

I really do enjoy making these but so often leave it to the last minute, 'cause I totally have so much free time to do this in right? Still I do plan on continuing this tradition for many a year to come.

Anyway that for this year is our Easter basket novelty. Would you care to share what  you think of our little Easter Robin?
Sorry about the poor photography- neither me or my camera are very good at 2am :)

Blessings to you and your homes,
 

Thursday, May 15, 2014

Easter 2014 - Paschal Candle Making

As it is still the Easter Season I feel I can still share my Easter posts that I have not had a chance to do as yet.
I know everyone is really past this by now but I just have to do it anyway, for me!
So feel free to click away if you want to (insert sad face if you do though).....

Each year I usually make a Paschal Candle for our family that  we try to light every evening during the Easter Season and for special occasions.
Now being totally honest that is the intention but sometimes we forget to do that in the business of those special occasions as we go about our daily tasks.
This year I actually remembered to make it early enough, unlike last year when I did not do it before Easter and so didn't bother at all.

I really am pleased with how it turned out and it is really easy to make.
This year again I thought I would share the easy way we make them.

Actually when I started many years ago I used to carve out the shape I wanted and them paint with oil paints.
Let me tell you  this way is much simpler and less messy (especially if you have little helpers)
So what do you need to decorate a Paschal Candle or any other decorated candle:
* A candle obviously
* decorating wax - we have had this box for well over 9 years and I tend to use it sparingly but still it lasts a long time and has many different colours
* scissors and or small cookie cut outs
* glue
* stick on jewels if you want some
Then just let your imagination run wild.
I roughly measure the shapes out and frankly I just eye ball it out when I am cutting, so you can notice variations in my straight lines.
You could use a ruler and measure but I don't :)
Cut out your shapes and then push them on to the candle using the heat of your hands to hold the shapes in place
Then using craft glue, glue on your jewels.
Perhaps you might have some stick on ones but I didn't and so used the glue and a paintbrush to apply the glue to the back of the jewel.
Then place your candle where you remember to light it daily during the Easter Season!!

Blessings to you and your homes,
 

Friday, April 18, 2014

"Pockets Full of Love"............This Year's Lenten Countdown

We are entering the final countdown on our Lenten Journey, faster than I ever thought possible,  and still I have not been able to share our "Pockets full of Love Countdown."

Our countdown this year was really a very simple project that seemed to reflect on the theme of Love that we had carried over form St Valentine's Day.

I wanted to have hearts as a theme and expand on the fact that it was Jesus' love for us that really gave us this opportunity of redemption.
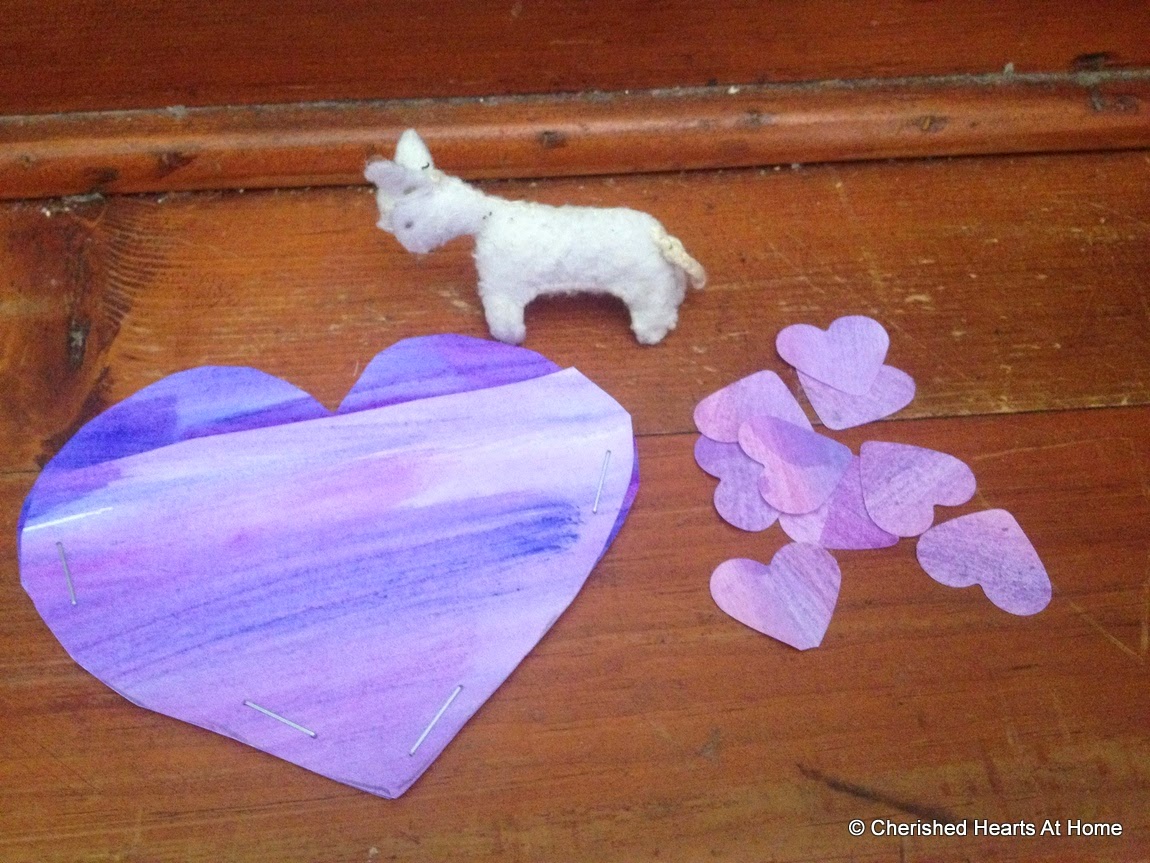
So I painted some A4 paper with shades of purple as that is the Liturgical colour and then cut them into heart shapes.
Of course we needed a token to move along the countdown to actually 'count down the days' and some years ago I had made a small felt lamb for another Easter countdown.

So again using the Lamb of God as our movable token we have a visible reminder of Jesus as a sacrifice in our place.
Next I thought we needed something to show our love and thus we have our little hearts that we put inside our pockets for every good deed, sacrifice and prayers through out the day.
Oh yes I did say a pocket didn't I!
Yes, so when I cut out the heart shapes I made sure I had two for every day of the countdown. Then I cut the top one off and stuck it to the back one.
I originally stapled them together but wasn't happy with the result so then I glued around the edges of every one.
For the little love tokens- I used a heart shape hole punch and cut out a heap with that and...............
put them in a basket ready to be used.
Then I simply threaded the hearts together and hung them on the wall where we wanted them.
Which is right near our dinner table and so very obvious to all throughout the day.
The final step was to number the hearts and write any significant days on like the Sundays and Holy Days.
Now the countdown can begin!!!

At the time of writing this post which is late Maundy Thursday evening we have managed to actually fill our all pockets with much love (emptying our basket) and ahead of time too. 
In fact we have been finished for at least a week now which is a great achievement for us.

Blessings to you and your homes,
 

Friday, April 4, 2014

Thick Greek Yogurt and how you can make it yourself................

I posted a photo of my Greek Yogurt on Instagram and facebook and had numerous questions asking how I made it...,....and so here it is.

I have often in the past wondered in the past what Greek Yogurt was and how it could possibly be different to other yogurt.

In the past months I have not only worked out what it is but also how to make it, and you can too! Greek yogurt has the whey drained out of it, as simple as that!

I have  used this recipe before and only now have I realised it has Greek yogurt instructions at the bottom of the post....duh.
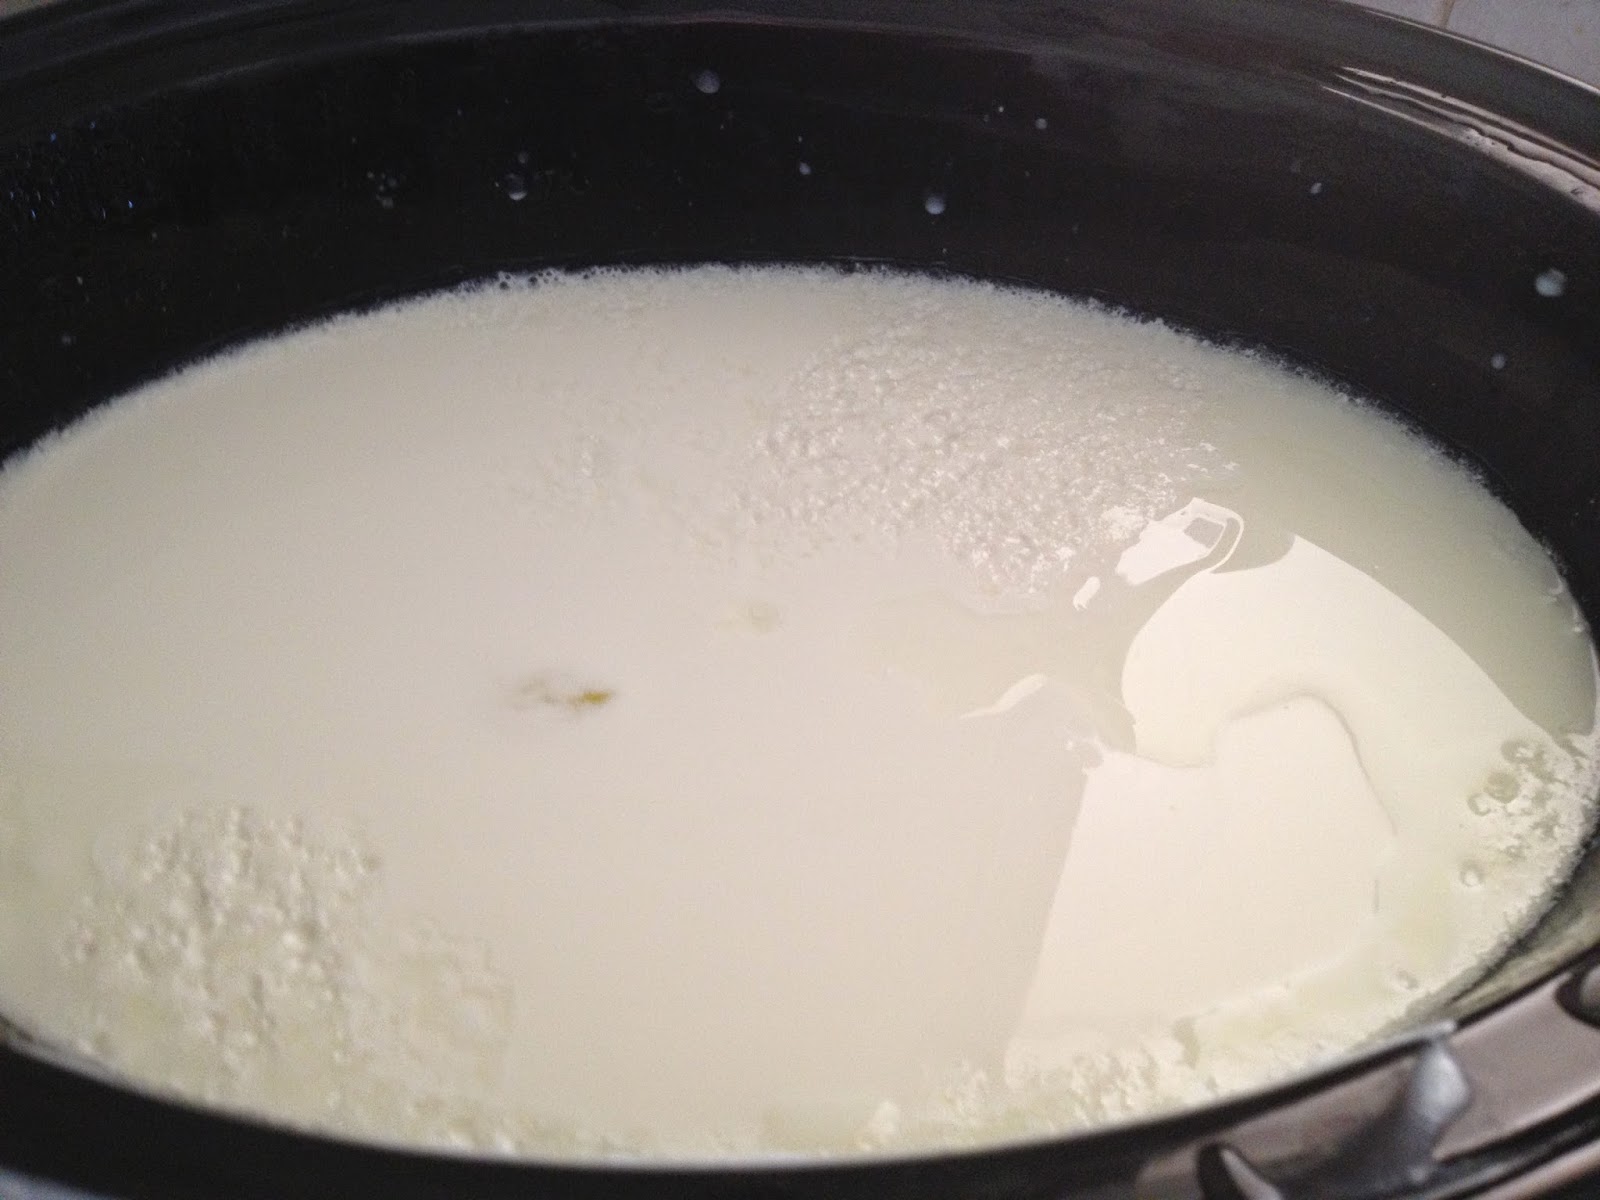
In a crock pot slow cooker, turn cooker to low and pour in  4 litres of milk. Cover and allow to cook for two and a half hours.

After two and a half hours have elapsed, turn off cooker, unplug from wall and allow to sit with the lid on for 2 more hours

After 2 hours  whisk in 1/2 to 1 cup of starter yogurt and recover with the lid.

Leave over night and next morning start the straining process
 Line a colander with cheesecloth (or as I do now with a bag)

 Poor the yogurt in and
 cover with a lid or cloth
 Tie the bag or cheese cloth up and leave for a few hours.
The longer you leave it the thicker it gets
 Nice thick yogurt to add to smoothies or have with some nice fruit.
And the whey you can make other things with like Tomato sauce (fermented) or lemonade.

Hope you enjoy this!!

Blessings to you and your homes,
 

LinkWithin

Related Posts Plugin for WordPress, Blogger...